Most of you must have seen a Sitemap page on many blogs or websites, and have wondered what it is and how it works. Sitemap page basically helps you in better and easier navigation and it also improves your page rank due to internal linking of all the posts on the blog. It also helps the search engine’s crawlers to index the content and pages easily and at a faster rate. In this chapter you will learn how to create sitemap for blogger using simple steps.
How Sitemap Page Works
Before dumping the code in your blog and simply leaving it alone, you need to know how it actually works. This is automated sitemap page which automatically adds the latest posts itself. You don’t need to update it manually everytime. In this page you can see that the posts are categorized according to the labels you have given in the blog. This sitemap page is developed using JavaScript and CSS which automatically takes the feed of your blog.
Creating Sitemap Page in Blogger
Here are few simple steps you need to follow to create Sitemap Page in your Blogger blog easily. It’s very simple task where you just need to paste the code.
Step 1: Open BloggerOpen Blogger.com and login to your account. Choose the blog which you are working on and open the Dashboard.
Step 2: Create Page
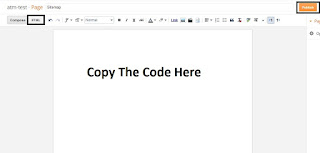
In the Blogger Dashboard, navigate to Pages and click on New Page. Enter the Title of your choice.
Goto the HTML Tab and just copy the code below and paste it there in the HTML Tab

You simply need to change “YOURDOMAIN” with your Blog Domain and Publish the page.
That’s it guys! You have just created Sitemap for your Blog. You can also change the CSS codes for any modifications in backgrounds too.
Sign up here with your email

